
2022-12-13
Opening Mastcam-Z PDS Images in Photoshop
by Sydney Larriva
Do you use the commercial image processing program Adobe Photoshop or another similar kind of image processing program? If so, do you want to learn how to open Mastcam-Z images that ASU has archived with the NASA Planetary Data System (PDS)?
Well then, here is A User’s Guide for Opening Mastcam-Z PDS Images in Photoshop (or similar)
Would you like to view and work with PDS archived Mastcam-Z images in Photoshop? Turns out you can! Full resolution Mastcam-Z images from the PDS can be found and downloaded from the Data Collection of the Mastcam-Z Science-Calibrated Bundle to your computer, and (with some adjustments) can be opened in Photoshop!
To begin, find an .IMG product you would like to open and explore from the Data Collection. Don’t know how to navigate the PDS? Check out our great blog: Mastcam-Z Data for All! to learn how.

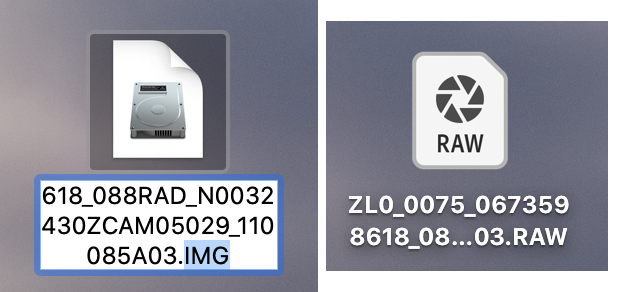
Figure 1: Example of a selected data product from the PDS Imaging Node
mars2020_mastcamz_sci_calibrated/data/0075/rad/ZL0_0075_0673598618_088RAD_N0032430ZCAM05029_110
085A03.IMG
Once you find an .IMG you want to open on the PDS, click to download it to your computer. Keep this page open! We will need it later (See Figure 1 above). Unfortunately, Photoshop does not recognize .IMG files as valid image products to open, so we need to rename our file to get it to open by changing it to a .RAW product. To do this, all we need to do is rename our image and replace the .IMG extension at the end to .RAW (Figure 2a). Once completed, it should look something like Figure 2b.
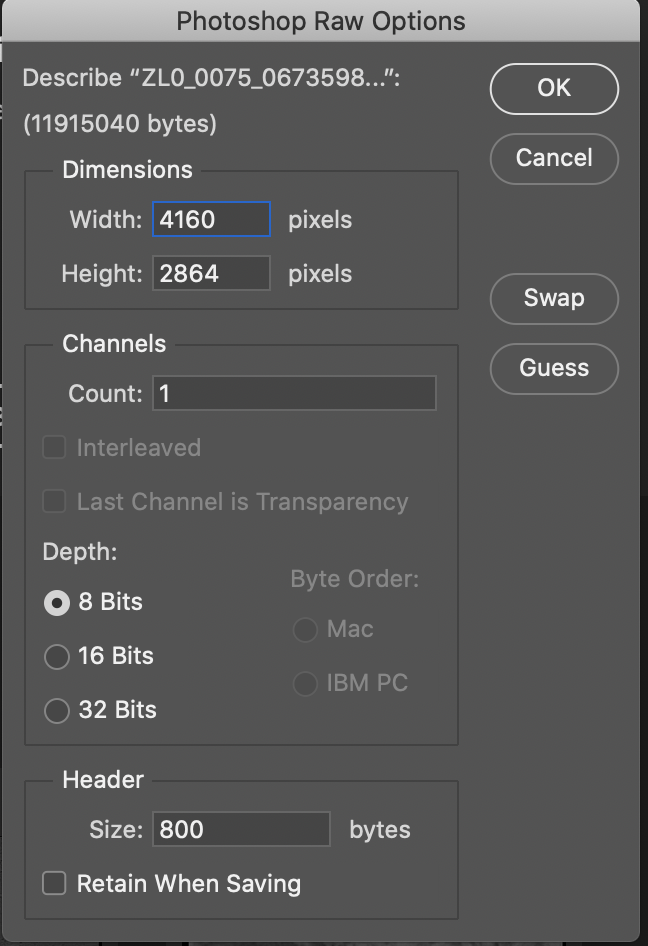
Now, we can open THIS image while in Photoshop! Click Open in the Photoshop File menu and select your newly-created .RAW product. Once you attempt to open your image, a window such as the one below (Figure 3) should appear, requesting a bit of information before we can move forward.
To get this necessary information, we have to open up the PDS label that is associated with this image. Navigate back to the PDS webpage that we downloaded our .IMG from and find its associated .xml. Which .xml label is associated with your image? It should be the one directly below your selected .IMG in the PDS directory, and it should have the exact same file name with the exception of the extension (see Figure 4 below).
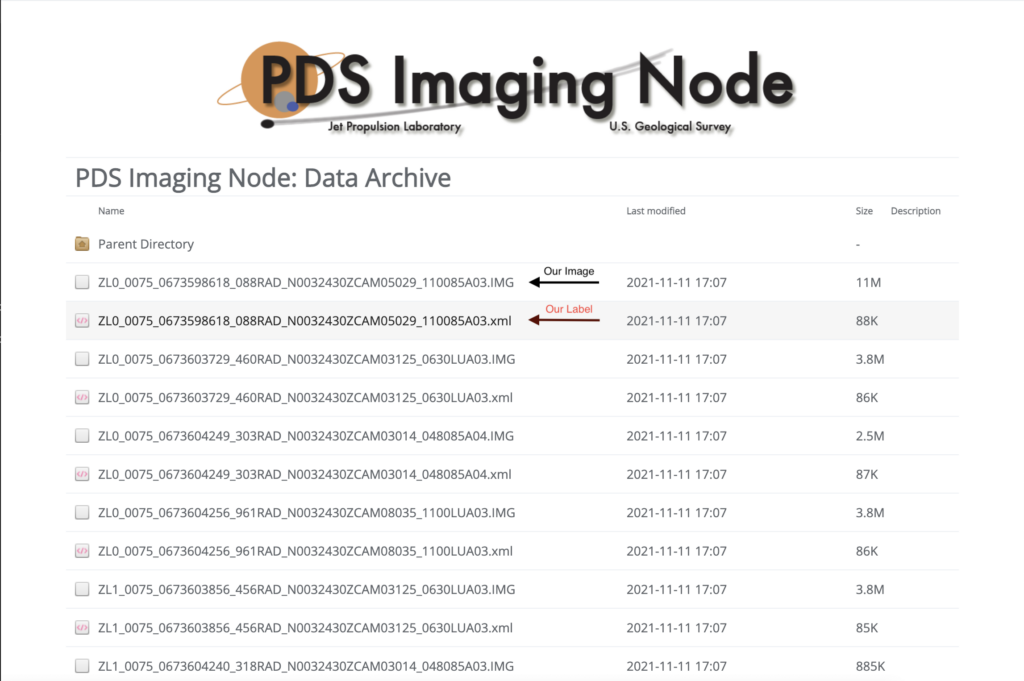
ZL0_0075_0673598618_088RAD_N0032430ZCAM05029_110085A03.xml
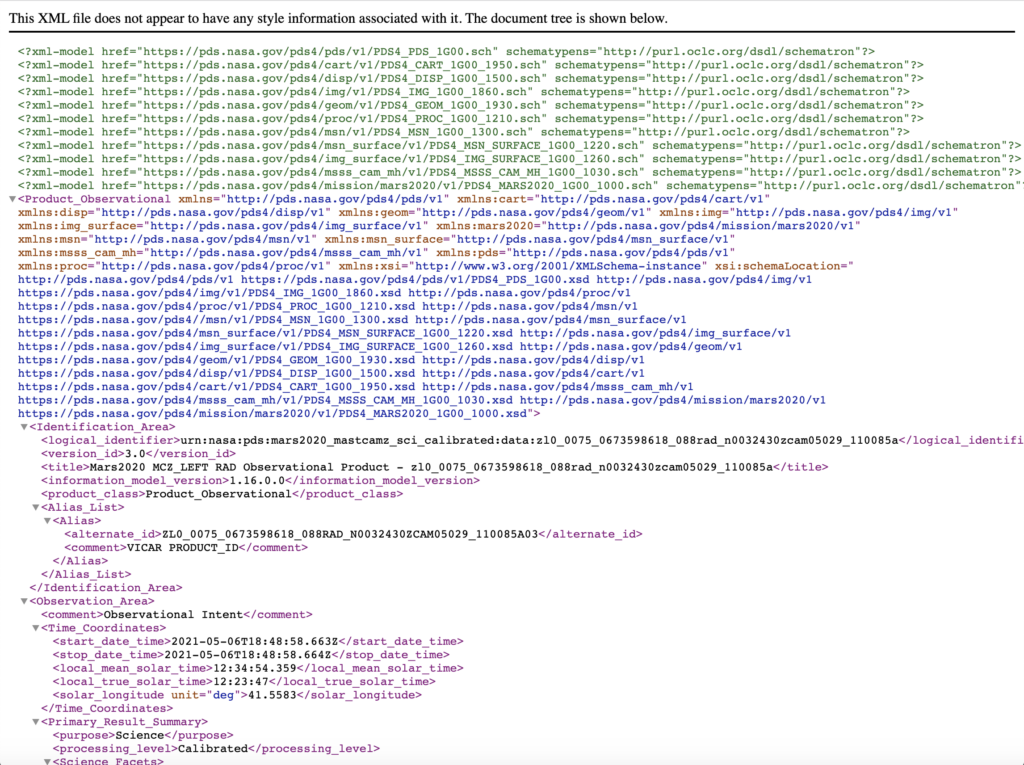
Select this file to open it. A page similar to Figure 5 should appear. Now this might be overwhelming, but do not fear! We will walk through this together. These labels contain metadata, or information about its image product. The current version of the PDS, PDS4, uses .xml labels which have nested entries (titles within titles) in the format of <name>value</name>. Most of this information we can ignore, but let’s travel down to the bottom of this page to the section of the label titled <File_Area_Observational> (Figure 6). Inside of this section, there are several additional, nested titles, such as: <File>, <Header>, and <Array_2D(or 3D)_Image>.
ZL0_0075_0673598618_088RAD_N0032430ZCAM05029_110085A03.IMG
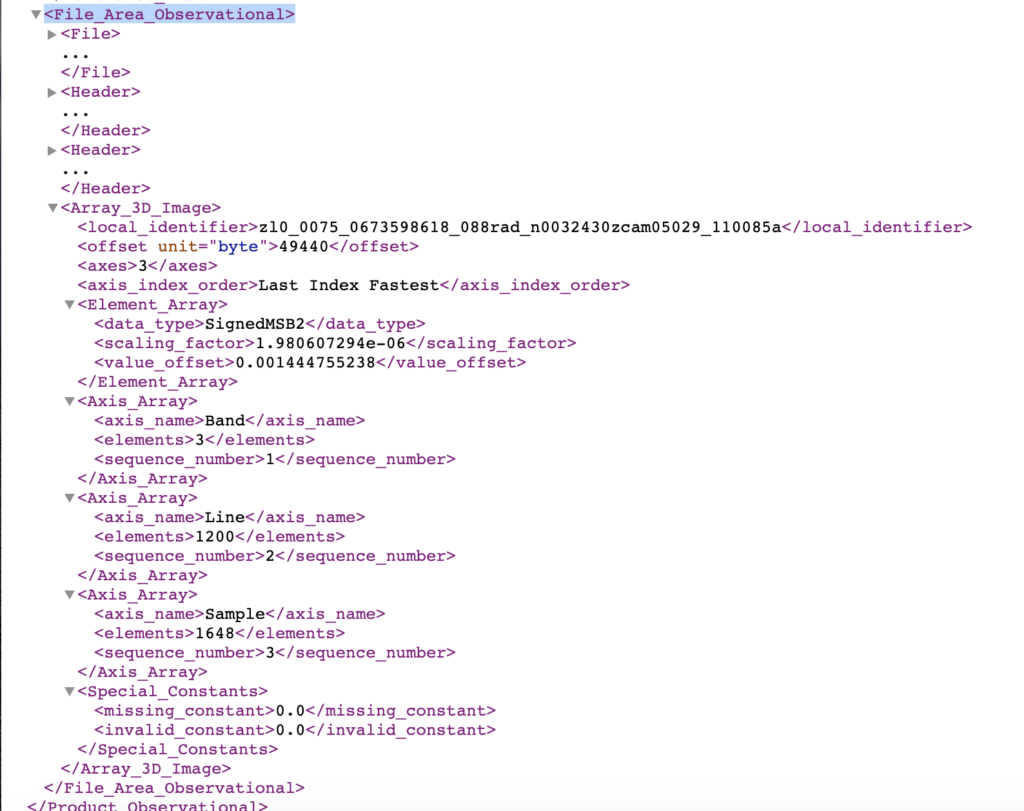
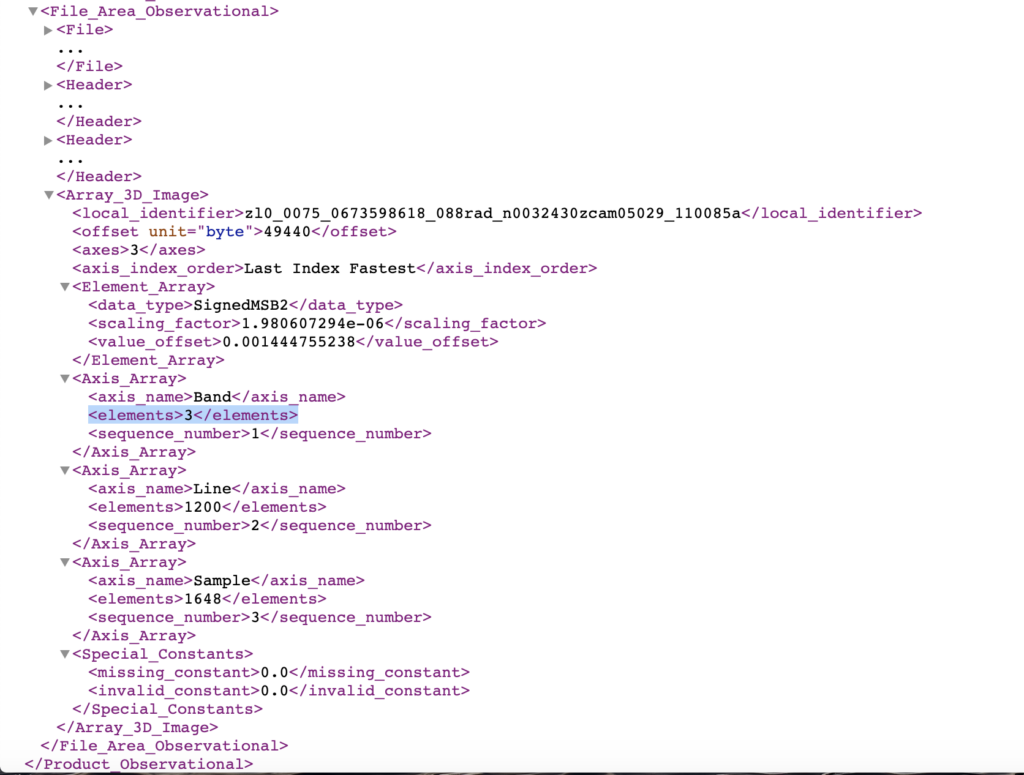
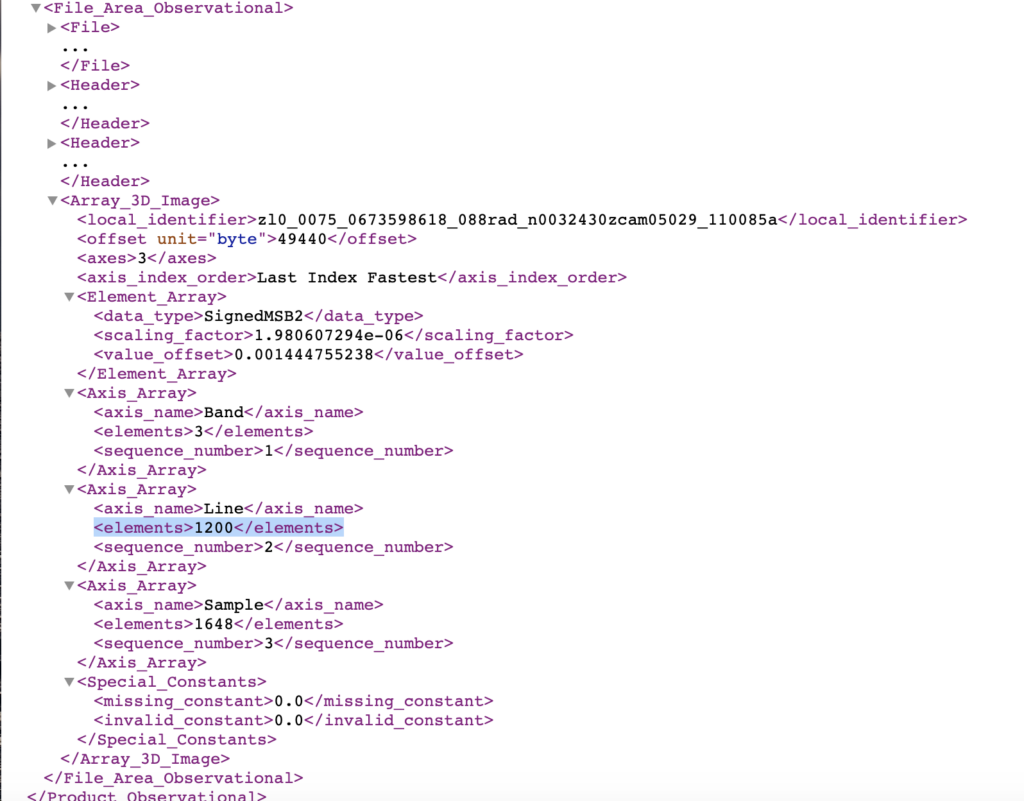
We will be getting our necessary information from the <Array_2/3D_Image> section, so let’s skip down to this section and close up the ones above to be able to focus just on this. Two lines below the <Array_2/3D_Image> title will be a label called <offset_unit=“byte”>###<offset> (Figure 7).
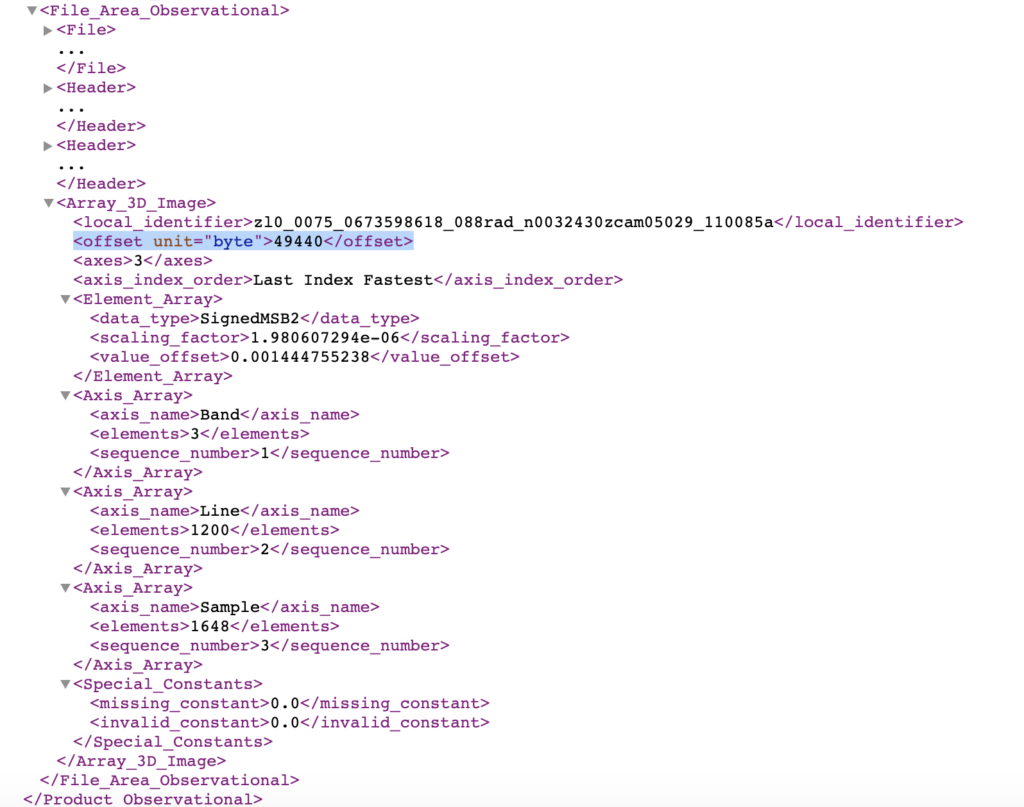
The value “###” in between the two label names is the size of the header on our image. So, for our example, it would be a 49440 byte offset. Let’s take this number and navigate back to our Photoshop window. Input this number at the bottom of the GUI under Header where it says Size: __ bytes (Figure 8). Right below <offset_unit=“byte”>###<offset> there is a label called <axes>#<axes>: make note of what this number is! If your nested label title is <Array_2D_Image> it should be 2. If it’s <Array_3D_Image> it should be 3.
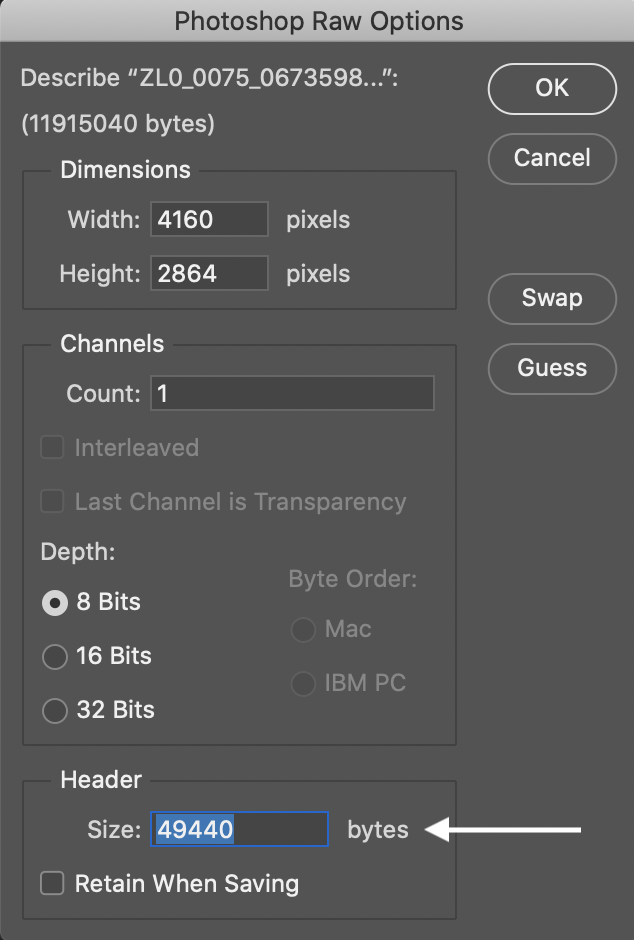
Figure 8: Header section of Photoshop GUI & location for inputting offset byte value
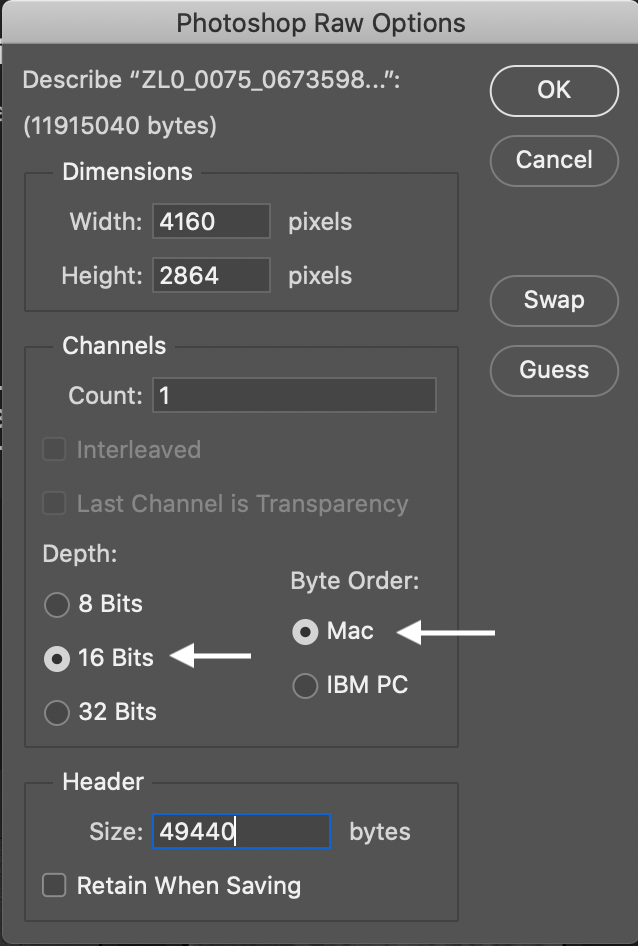
The first subheader title under <Array_2/3D_Image> will be <Element_Array>. We will be getting information about the bit depth of our image from this section; the default is 8 bits in Photoshop. To do this, we will have to look at the label <data_type>******</data_type> (Figure 9).
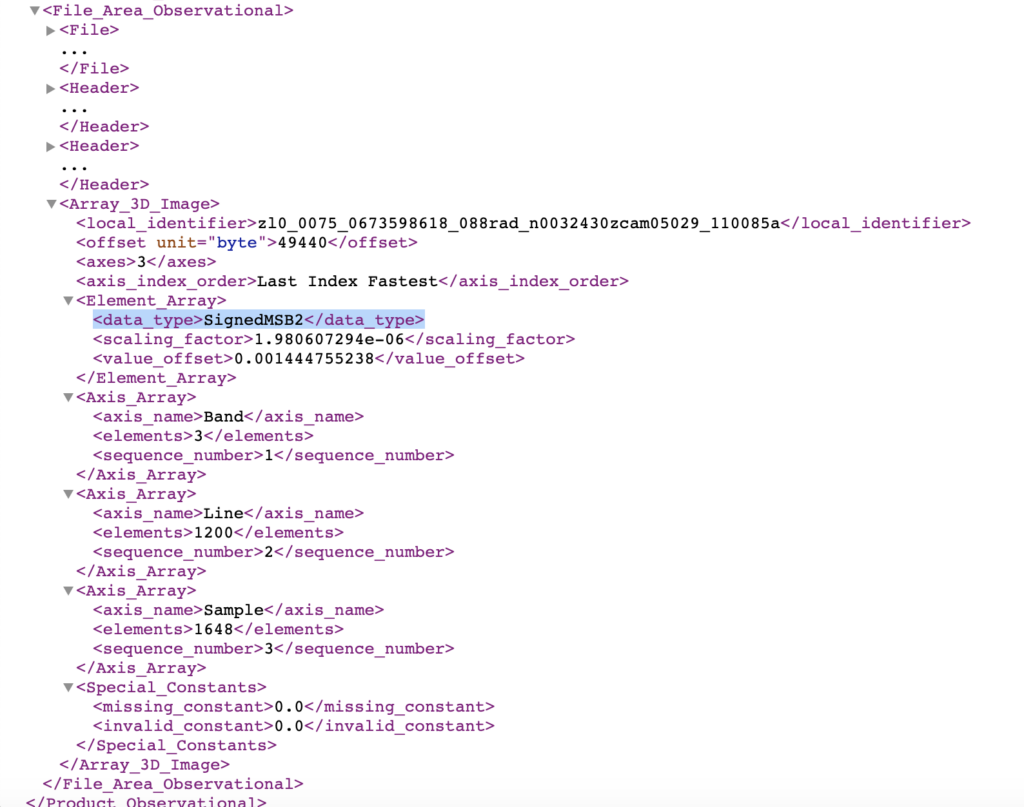
The name of this data type relates to a particular bit depth and byte order (refer to Table 1).
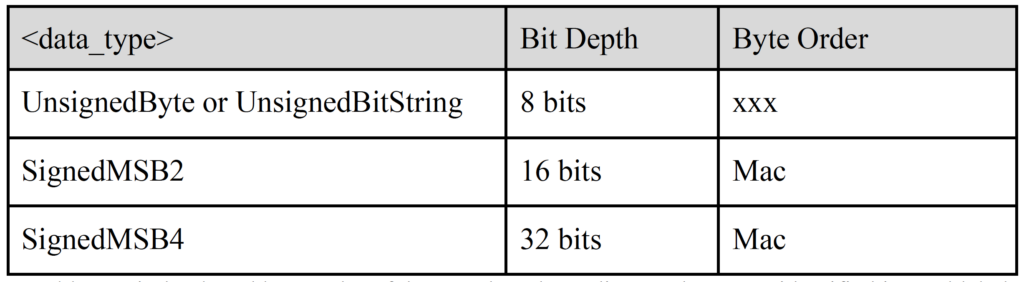
If your data type is not one of the examples in the table below, go to the PDS4_Data_Dictionary to find the definitions, beginning on page 160, with the table entitled data_type in Element_Array to find the appropriate bit depth value and byte order. If the byte order is “most significant byte first” then select Mac. If it is “least significant byte first” select IBM PC. (Data types with a bit depth of 8 do not need to be concerned with byte order.) Once you have found your two values, input them under Depth as seen in Figure 10.
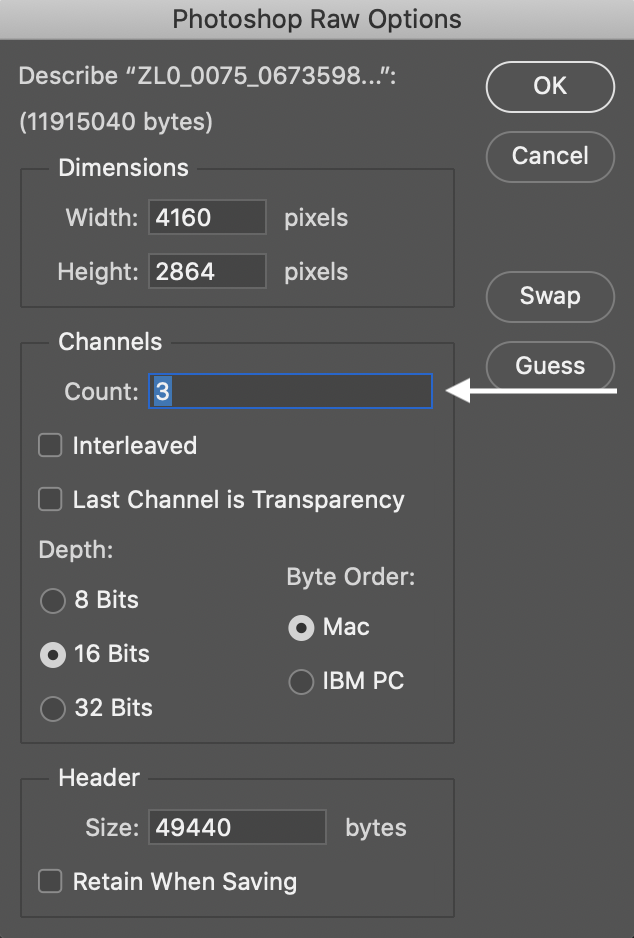
Below <Element_Array> should begin the <Axis_Array> headers. There should be one for each axis your image has (2 for 2D Image and 3 for 3D Image). If your product has been labeled a 3D image with 3 axes, the first <Axis_Array> title represents how many Bands (called Channels on our Photoshop GUI page), or how many layers are present in our image. Under <axis_name>Band</axis_name> will be the value we need, labeled <elements>#</elements> (see Figure 11).
Let’s take this number and replace the default channel count under Channels on our Photoshop page with this value. Make sure that the two options below Count (Interleaved & Last Channel is Transparency) are left blank (Figure 12).
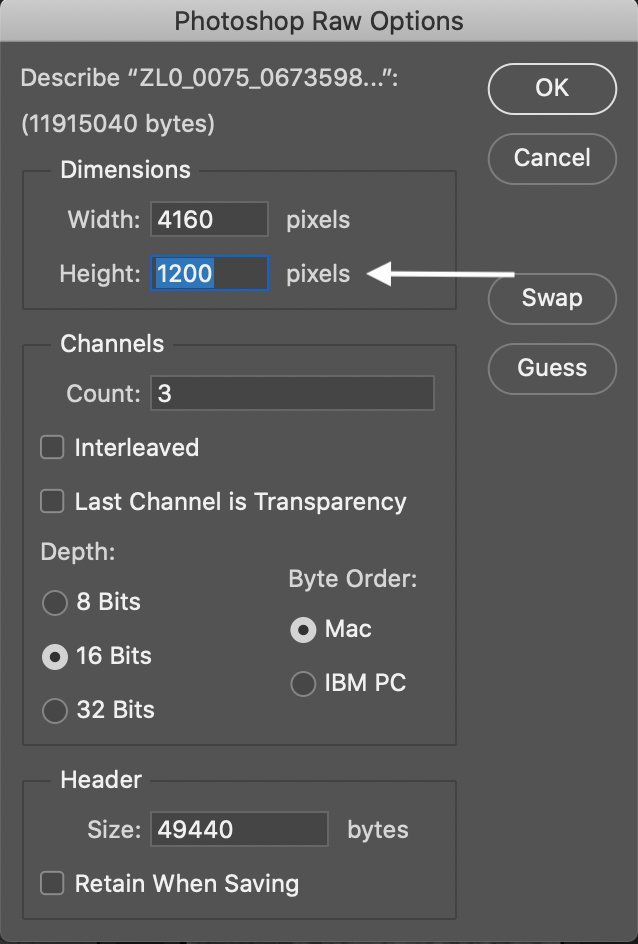
The second <Axis_Array> header for a 3D image (or first if we are dealing with a 2D image), represents the value of the image’s height, called Line in our label, in units of the number of pixels. Below the label <axis_name>Line</axis_name> will be our image height, labeled <elements>####</elements> (Figure 13).
Take this value and plug it in as our image height under Dimensions in our Photoshop GUI (Figure 14).
Our final <Axis_Array> header, and the last of the information we need, represents our image’s width an is called Sample. Below <axis_name>Sample</axis_name>, our pixel width value can be found, labeled <elements>####</elements> (Figure 15).
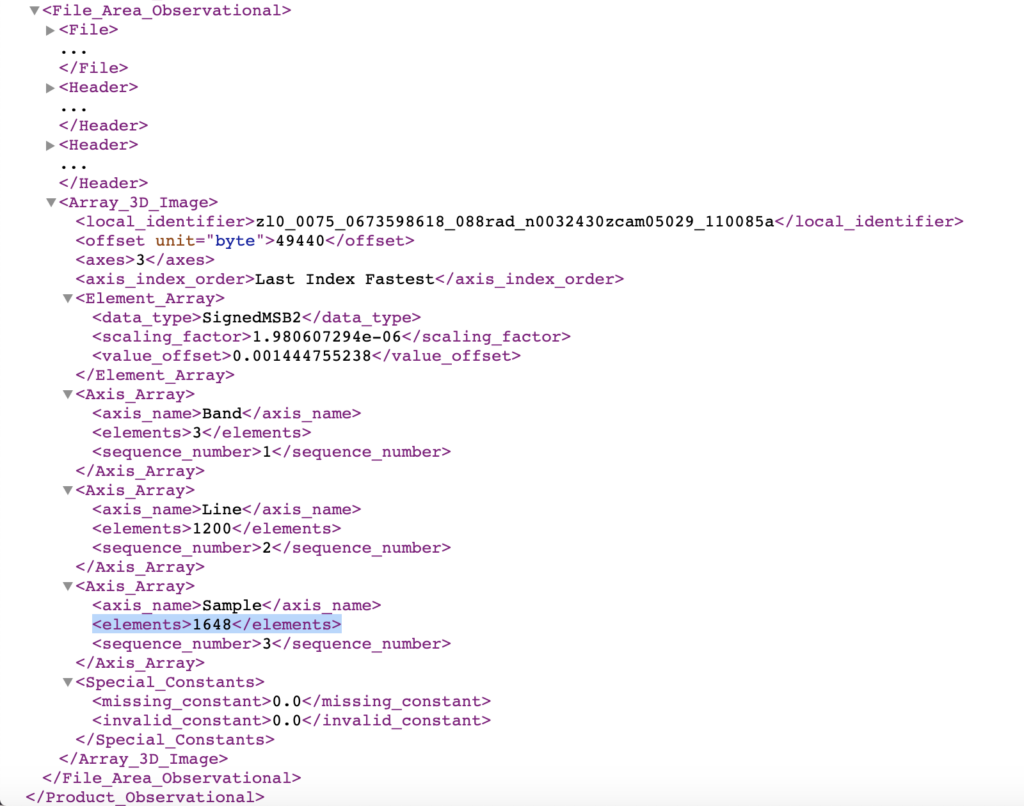
Insert this value as our image width under Dimensions in Photoshop (Figure 16), and we are done!

Click OK to open up your long-awaited Mastcam-Z image (Figure 17).

ZL0_0075_0673598618_088RAD_N0032430ZCAM05029_110085A03.IMG opened on Photoshop
Congratulations!! We finally made it through. You might need to make some adjustments to either Levels or Exposure initially from the Image menu bar if the image is too dark, but now you are free to Photoshop to your heart’s content!
Curious about further resources to view and learn about ASU’s Mastcam-Z Images from the PDS? Only interested in performing simple image alterations and want a simpler process to open and view images? Go check out our other amazing blogs on the Mastcam-Z website on other PDS Tools that might work for you! Have fun exploring the world of Mastcam-Z!
p.s.: Though the focus of this User’s Guide is specifically on how to open PDS-archived Mastcam-Z images, the information presented here is based on and expands upon the post: Image processing trick: How to open PDS-formatted images in Photoshop by Emily Lakdawalla from The Planetary Society. If you are curious as to the math behind the numbers or desire another resource to help you in your Mastcam-Z Photoshop endeavors, go ahead and check it out that post by Emily!